Showing posts with label Harry Potter tour. Show all posts

Tuesday, 10 June 2014

Finishing up those Harry Potter pages


It has been a good year since I looked at my Harry Potter album as I rarely scrap more than a few months after the event, but looking back over my 800 posts reminded me of how much fun we had at the Harry Potter studio an dhow much I enjoyed scrapping. So I decided to take the last few photos I wanted to get into the album and the remains of the kit I had put together to France in half term.

I made 5 pages and pretty much decimated what was left of the kit. They needed a few finishing touches when I got home so I did that this morning and then photographed them.

Although I used the same kit of embellishments, I think the style is slightly different from the first pages I made. I'll spread them out through the album so I don't think anyone will notice.

 These 2 photos are scanned from the 'greens screen' shots I paid for when we were there. They felt more 'special' than the 150 or so I took myself and for some reason I fhad elt more pressure about scrapping them, but I really wanted them in the album so this time I just went for it.  This is the only double spread so I wanted it to stand out as being different from the rest and I'm happy with how it turned out. I especially like the black and white 'barcode' paper.
                           
                           
 I think this one needs something in the centre of the bookmark, but I can't find the perfect embellishment so I'm going to leave it for now.
 This is to use up all those extra little pictures. I was going to use a PL page protector, but I'd forgotten my HP album was post-bound so I opted for a PL-style grid pattern instead.
I think this page is my favourite. lots of layers to reflect the detail of the set of the Weasleys' house.

Sunday, 15 September 2013

Title Page

You might have seen this episode of Glitter Girl when she gives advice about creating a title page. Well, the question she answered was mine and I have finally got round to using her ideas and making a title page for my Harry Potter Tour album.

I had already scrapped the A-side of this Harry Potter themed paper from Scrapping the Magic
but it seemed a waste not to use both sides so I made my title page on the back. I'll remember this trick for other papers of which I love both A and B side, it's economical too. Don't know why I'd never thought of it before.

The photo is actually a postcard of the 1/3 ratio model of Hogwarts. I used the ticket from our day there so the Phoenix gave me my colour scheme. The small letter stickers were white so I coloured them with gel pens and used a Sakura Clear Star pen to add some sparkle to the printed word.
Glitter Girl's advice was to use all the colours and repeated elements that appear frequently in the album to give the title page cohesion. In this case,  most of the layouts are on a dark background and I have used the Queen & Co film strip washi tape, a ticket and/or Harry Potter trading card, owl motifs and black & white baker's twine on almost all of them.

Do you make title pages for your albums? This was my first one. I usually stick to chronological albums, although I do also have a Book of Me and a Family Tree album which I might make titles for now.

Sunday, 16 June 2013

Putting the Scrap Back into Scrapbooking

What do you do with your scraps?
I mainly use mine for cardmaking and that means I have a habit of saving even tiny scraps and eventually they get out of hand.

My scraps box was full to overflowing so last week, when P was out for the evening, I emptied and sorted all the pieces into 9 'kits'. They are not kits in the true sense as there are no embellishments or cardstock but the papers co-ordinate in colour/tone/style. I added in all my partial alpha sheets too, the ones with no vowels, thinking if they are together I'm more likely to use them for a mixed-font title or something.
A few weeks ago I shared a layout in which my background was entirely made of a patchwork of scraps. My blog friend Sian commented that there was a potential Blog Hop in there. Well, I'm not really confident about organising a full Blog Hop, but I'm happy to open this up for you play along.

For the rest of the summer (apart from a few themed layouts I already have started) I want to use these kits as much as possible. As I pull each one out, I'll add embellishments and ribbon, tape etc. I'm not going to make things difficult for myself and ban shopping for extras. It's just about using what I have. I'll make cards for my stash as I go along too so, hopefully, I won't have too much left.
The first I pulled out to tackle was this kit of dark reds, blues and greens in vaguely vintage tones.There were a couple of A4 sheets but the rest were little scraps. I went hunting for photos which would work with the colour scheme and found 2 of the fireplace in our French house.
I choose this sheet of green linen effect cardstock by DCWV for my background and then arranged the papers I had. The two strips of red were exactly that size straight from my scraps kit. I cut the doily paper into 3 pieces. I wasn't worried about the gap in the centre as I knew it would be covered by my matted photos.
The papers for the double mat were also in the kit, as were the doily and the alphas. The embellishments were cut from papers in the kits and I just added some stitching, buttons and washi tape. I wanted this to have a cosy, domestic feel and I think I've achieved that.
But I didn't stop there. I found this owl amongst the papers and I love owls. I have used an owl motif on all of my Harry Potter pages, so I went to my HP kit to see if I could use him there. I'd forgotten the B-side of one of the themed papers I bought from Scrap the Magic was 'Owl Post'. I added Glossy Accents to give him some strength and attached him over the printed owl on the paper.
Again, the papers for matting and the letters came from the scraps kit. The other embellishments are from my HP kit.
My last project from this kit was a quick card. All I have left is this:
I cut the remaining pieces into even blocks, through away anything smaller than 3x4 and put the remainder at the bottom of the green scraps file, from whence they originally came. I haven't blitzed the kit, but I've certainly reduced it in volume, and I enjoyed creating in this way.

If you would like to Put the Scrap Back into Scrapbooking and make a dent in your own pile of scraps, why don't you join me? Set aside an hour to sort your scraps into 'kits'. They can be themed by topic (Outdoor photos, vintage) or by colour. Make sure you keep the tones matching, unless you really like using bold and pastel colours together.

There are absolutely no rules for how you use the kits, but I'd love to see what you come up with so please link back to me in your posts and leave me a comment so I can pop over and visit. Happy Scrapping!

Wednesday, 22 May 2013

Using themed papers (unsuccessfully)


I don't use themed papers often, but I saw these Harry Potter papers from Scrapping the Magic on FurryPig's blog and I really wanted some.

However, when I pulled out my pictures from our day at the Harry Potter studio, I remembered why I rarely use themed papers. They are much too nice to cover up. And the designs cover the whole sheet so it doesn't make sense if you can only see part of it. I layered the Daily Prophet on purple to bring out the colour of the Knight Bus and added some of the trimmed off strips at the side to look like extra pages.

I quite like that bit, but I also had the door (which was a piece of packaging with a title that I wanted to use) and that couldn't be layered easily either or I'd lose some of the wording. I ended up putting it right in the corner. I knew as soon as I had adhered it that it wasn't right but I didn't  have a second sheet of either paper so I was committed.  I couldn't bear to cut or cover any more so I had no room for embellishments or journalling. I added some purple gems and a few strips of dymo, but it is still all unbalanced. It was a mistake to use both themed pieces here, in retrospect. Still, you live and learn.

Thursday, 16 May 2013

Putting the scrap back into scrapbooking

This is a really scrappy page, in the best sense of the word.
  Sorry I didn't photograph the papers before adding the washi tape and photos (I was at a crop and my camera/phone was out of charge.) You'll have to take me word for it that not one of the pieces of patterned paper was larger than 6x6 - they are all patched together under the photos. I used the yellow washi to cover the joins and to introduce another colour to the burgundy.
I downloaded the Gryffindor House crest to create the journalling card in Photoshop Elements.
The trading card was perfect - I love having a scene from the film which was actually filmed on that set. I used a Dovecraft doily to ground my embellishments and added chipboard flowers and pearls from Hobbycraft.
The little Hedwig was made at the crop using a borrowed Build-An-Owl punch by Stampin'Up. It's so cute - I punched out several from different papers while I had the use of it.
I don't have a diecutting machine so the title is stencilled and handcut. Then I spoiled it a bit by drawing round it in gold. The circular stickers are Konnichiwa by Basic Grey.
This was quite satisfying to put together, although it took a while for it to come together. I like how all the little details add up to the whole - just like the Harry Potter sets.

Thursday, 7 March 2013

Third Harry Potter Layout

I'm sorry if I'm boring you, but scrapping these Harry Potter photos is just so much fun! This is No3 and I've hardly started. I'm starting to think I might have to have a separate album for them.
                            
It was 'Wand Week' when we visited the studio and there were several Death Eaters who wandered about challenging the children to duels. They also set up wand-fighting masterclasses to demonstrate the different moves. One might expect a 5-year to be at least a little in awe of these baddies, but not my daughter! Both R and M confidently took on the Death Eaters, who were gracious enough to concede defeat.
 The DCWV background and the starry Heid Swapp papers were a bit dark with the photos so I added the pink branding strip from a Echo Park 12x12 to pick out the pink in M's coat. The acrylic circles emphasised the 'tunnel' (which was actually just a painted backdrop) and I. used pink distress ink to lightly colour them. The large alpha is a Pink Paislee Mistable, coloured with the same ink and the smaller one is by Echo Park. The rest of the embellishments came out of the kit I put together at the start - trading cards, tickets, owl rub-ons and filmstrip washi tape.

Wednesday, 27 February 2013

Circle embellishments, flying cars and stretching your stash

The 'green screen' experience was one of the highlights at the Harry Potter studio. The kids loved riding a broom to create a piece of footage which could then be projected onto backgrounds from the films. I was happy to get a rare photo of all 4 of us together, even if it did cost me £7 for the print. The first thing I did when I got home was scan it so I could reprint it at scrapbooking size.

The 2 'broom' pictures will get scrapped soon, but this weekend I wanted to play with the one of us all 'flying' the enchanted Ford Anglia. (It's taken until today to get enough sunlight in the dining room to photograph it!)
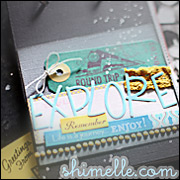
 Having rediscovered the class I took 2 summers ago ('Explore' by Shimelle) when I made my first Harry Potter layout, I decided to go back and revisit all the other prompts and videos. One was focussed on making circle embellishments with map paper, and then using them on a layout. I spent a pleasant hour doing what Nigella, were she a scrapbooker, would call "a little light punching and sticking" (Shimelle and Nigella- 2 female gurus who have risen to first-name-only status in their fields!)
My impatient streak means that if I leave it until I've nearly finished a layout, I rarely spend long creating really detailed embellishments. This way, the focus of my crafting time was just the embellishments, and I'm really happy with how they turned out. All the papers were scraps which I'd already picked out for my Harry Potter kit, with the addition of the red to give it some 'pop'.
The 'stash stretching'  came into play when I made my background. I really loved both A and B sides of the Heidi Swapp No Limits paper and they both matched the photo well, but I only had 1 sheet. So, I cut a wide slice off the top, reversed it and cut it into 2 assymetrical strips. I then took a less-loved sheet of paper and layered the pieces back together, adding in some of the red and blue that I had used for the embellishments at top and bottom.

From there it was just a matter of matting the photo, adding a title and hand-writing my journalling. I highlighted some keywords with computer-generated mini letter tiles.

Friday, 22 February 2013

Creating a layout from Z to A


I made this layout backwards, mainly because I was too impatient to wait until I had time to work on it in the normal way so I did each stage as and when I could over the course of a day.
I started by creating this embellishment cluster, comprising a ticket, a tag and a Harry Potter trading card. I let the green cauldron motif dictate the colour scheme. I applied the Maya Road owl to a scrap of green patterned paper and inked the edge of the acylic star with black Staz On.

My next stage was to mat my photos onto green cardstock and vellum. Then I typed up my journalling and matted that on another tag. I included a quote from 'Harry Potter and the Philosopher's Stone' (Sorcerer's Stone if you're in the USA, I think) and I plan to use a quote on each layout I make.

You are here to learn the subtle science and exact art of potion-making. As there is little foolish wand-waving here, many of you will hardly believe this is magic. I don't expect you will really understand the beauty of the softly simmering cauldron with its shimmering fumes, the delicate power of liquids that creep through human veins, bewitching the mind, ensnaring the senses... I can teach you how to bottle fame, brew glory, even put a stopper on death — if you aren't as big a bunch of dunderheads as I usually have to teach."
One of my favourite sets at the Harry Potter Studio was Professor Snape’s ‘Potions Classroom’. The attention to detail in the bottles of ingredients and delicate chemical equipment was fantastic. Each of the glass jars had been hand-labelled by the 200-strong props team. One cauldron glowed a magical green and stirred itself slowly as if by magic.
 
 
When I got to this point I remembered I had seen Shimelle do something similar in her class 'Explore' a couple of summers ago, so I went back and rewatched the videos for inspiration. I love that, having paid for a class at shimelle.com, I have permanent access to the archives.


The final stage was to decide on a background. Although I love both sides of the blue Heidi Swapp map/compass print, the colours didn't work and I finally opted for glossy Bazzill Basics black layered on green Core'dinations cardstock. No patterned papers at all.

These stages had taken the whole day on and off but the rest of the layout came together quickly after that. I added a title with 2 fonts. (Useful hint to self: the black tile letters are not self-adhesive so I spelled out the word 'details' on a  strip of double-sided tape which made it much easier to move it around on the page before pulling off the backing paper and sticking it down.)
I finished off the page with more of the film strip washi tape, acrylic shapes adhered with Glossy Accents and adhesive pearls, all of which I had started with. I really like how the process came full circle and I'm pleased with the final page. As a bonus, my husband's comment when he saw it was "Very green. Very Slytherin!" I hadn't even thought of that!
 

Tuesday, 19 February 2013

Favourite photos from the Harry Potter Studio Tour

Our trip to the Harry Potter Studio tour on Saturday turned out to be that very rare thing; a family day out which we all enjoyed. Of course, we took different things away from it: M loved learning how to duel the Death Eaters whilst R adored riding a broomstick against a Green Screen and seeing himself 'flying' for real against backgrounds from the films. I was simply awestruck by the detailing in the sets and props and the art of the animatronics team and even P, who is a Theme Park-hater, was fascinated. Although neither of us are really film buffs, we will have a much greater appreciation of the film-making process from now on. I'm dying to re-watch some of the Harry Potter and try to spot the details we saw in the studio.

I took 140 photos, but these are my favourites and the ones which will be making an appearance on my scrapbook pages as soon as possible. Apologies if you're not an HP fan - it won't mean much to you, but if you are and you have the chance to visit this Studio Tour, take it from me - you'll love it.
Wizard Chess pieces

Honeydukes Sweet Shop

The Cupboard Under The Satirs were Harry was sleeping before he discovered his Wizardry
The Great Hall at Hogwarts School of Witchcraft and Wizadry
`
Family portrait in the Mirror of Erised

A carving the Great Hall

Duelling Death Eaters
                           

The Boys' Dormitory

The Gryfindor Common Room

A Green Screen broom

Entrance to the Ministry of Magic - M was unfazed by the Death Eater as you can see

Wand Masterclass


The Weasleys' kitchen - the frying pan was washing up and the knife chopping 'as if by magic'

Potions' Classroom - the detail here was phenomenal


Hagrid's motorbike and the Knight Bus

A Mangrove
Diagon Alley

1/300 scale model of Hogwarts