


I had a lovely day yesterday at the Scraploonies' Retreat. I was only able to attend the Sunday but still I produced 2 layouts which I love and a couple of half-finished ones.
The blue 'School Photo' is the product of my first ever taught class. Karen did a great job of talking us through step by step to complete this tags layout. She has kindly agreed to let me share the instructions for it with you, on condition that I mention it was originally inspired by Paula Pascal.
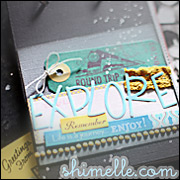
The 'Rosemary for Remembrance' LO, showing me rehearsing for a college production of Hamlet, was the result of a kit challenge. I received a very pretty wedding-y kit, which would have been perfect had I had any wedding photos with me! I got very frustrated with the weaving, and I admit I hadn't planned to put the title round the corner, but I was still quite pleased with it in the end.
So, with thanks to Karen and Paula, here are the instructions for a blue tag page (the papers come from American Traditional Designs Cardstock bundle 1):
- Cut 1/2" from the blue polka dot paper on 2 sides. Cut 2 large tags from the offcuts.
- Take the misty blue sheet and, holding a ruler 2" from the edge tear a section from 2 sides. distress the edges with an emery board.
- Cut 2 small tags from lilac/green dotted card
- Ink the Rhona Farrer flourish stamp with grape ink and stamp around the edges of the blue spotty card and all over the large tags. Ink around the edges of all with cut'n'dry foam and grape ink.
- Ink around the dark blue card and the piece of misty blue paper with cut 'n' dry foam and grape ink.
- Punch 4 x 3/4" circles from the smallest mat stacks in the Cardstock bundle. Ink them, add them to the tags and punch a hole to thread the fibres through.
- Adhere dotty sheet centrally to dark blue cardstock and the misty piece on top of that
- Using " a bit of judicious jiggery pokery", position your photograph behind the tags so that no photo shows beneath them.
- Adhere the tags on the edges only and add 5 brads on each side.
- Ink the edges and attach your photograph and journalling panel
- Tie fibres through the tags and use double-sided tape under the small tags to stop them falling together.
- Add letter titles and journal the date on the small tags


No comments:
Post a Comment